Jul 5 2022
Nakatamaakewin Stencil Lesson
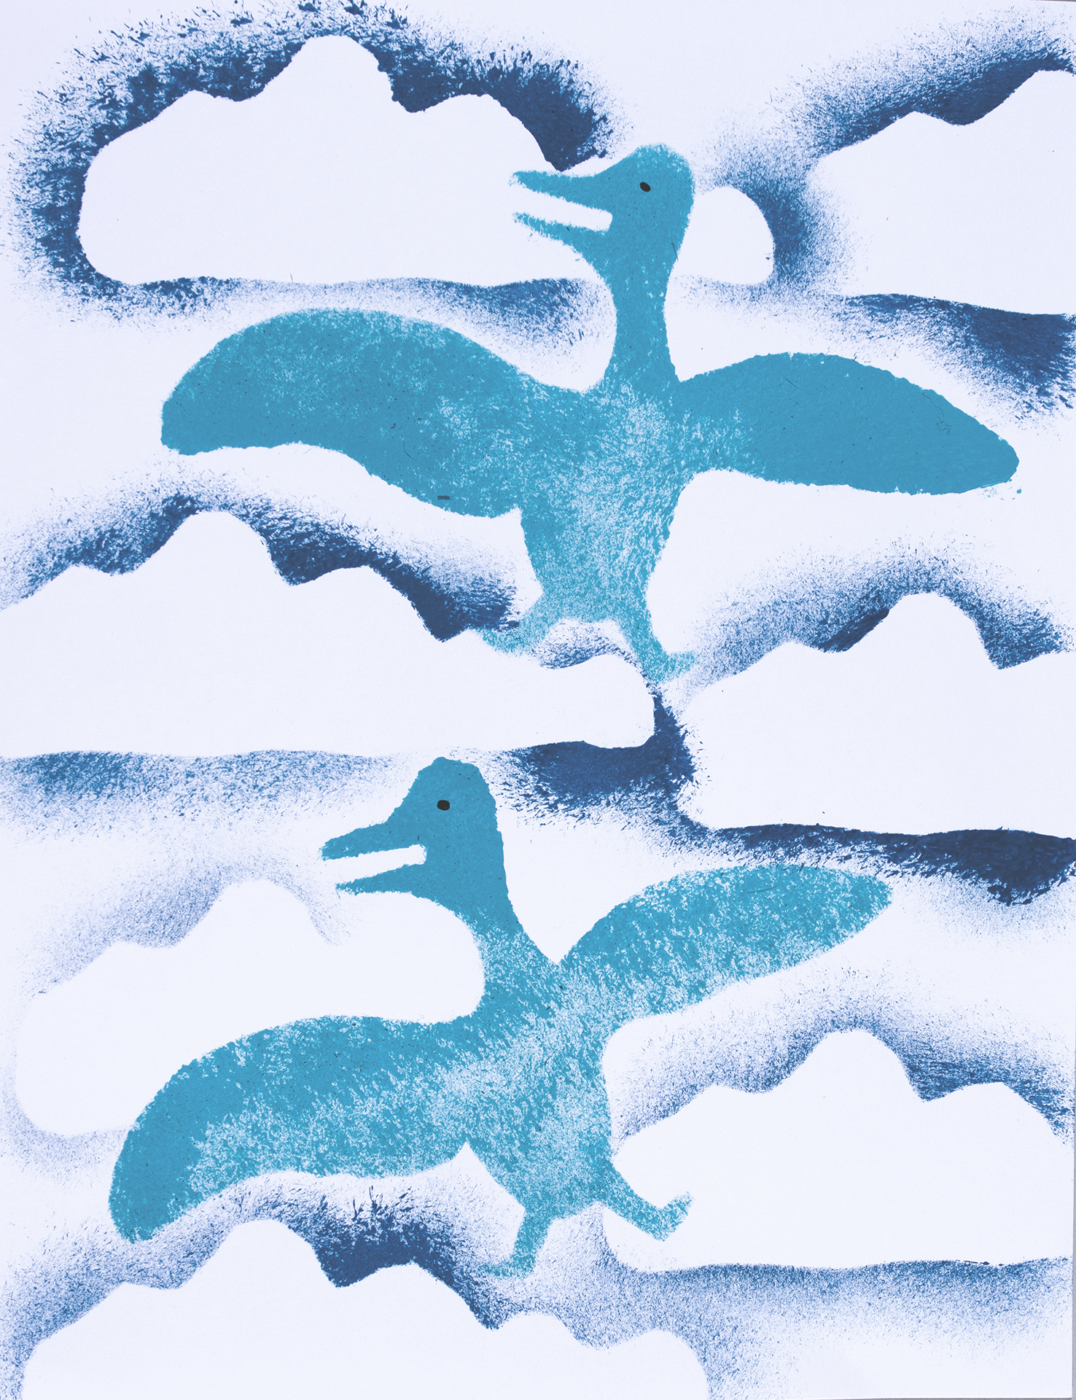
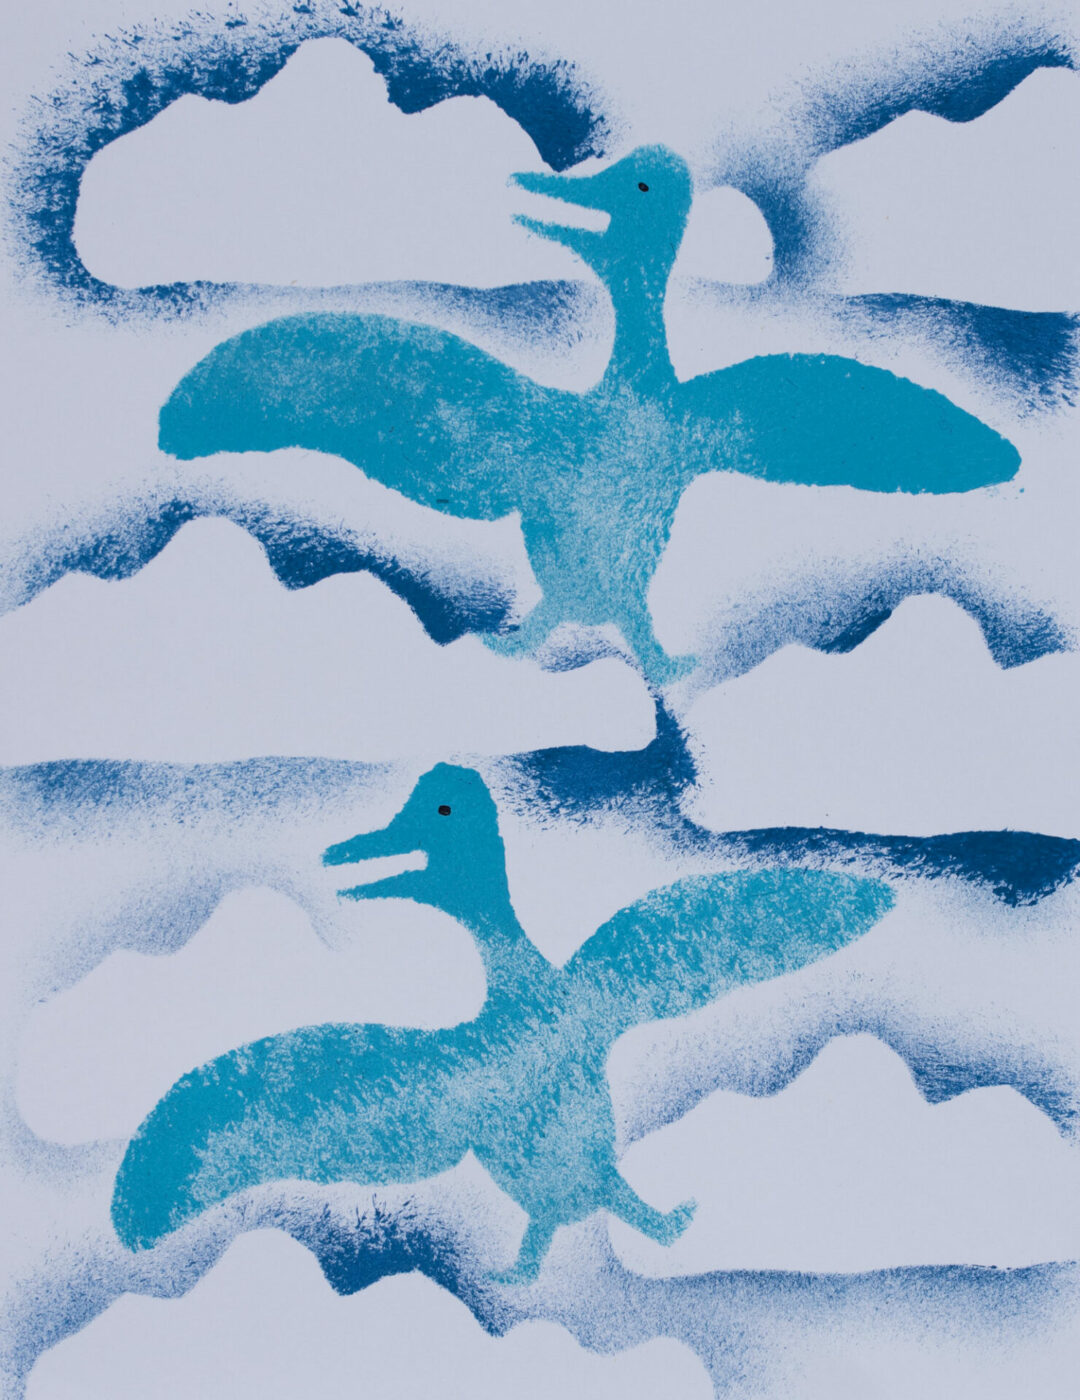
Final Print
Stencil printmaking is a technique that has been used widely in Inuit Nunangat, especially in the communities of Ulukhaktok, Kinngait, and Pangirtung.
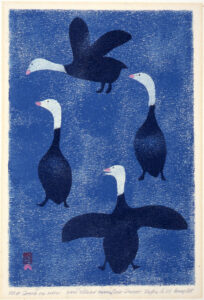
Kellypalik Mangitak’s 1959 stencil print, Blue Geese on Snow, is a great example of this technique.
A stencil is a tool that we are going to create to help us make a special print.
Materials:
- 2 pieces of cardstock paper per student
- Pencil
- Scissors
- Paint (liquid tempera or acrylic)
- Paint brush (a round thick paint brush is best)
- Palette for paint (could be a plastic lid, or a small piece of cardboard, just something to put your paint on)
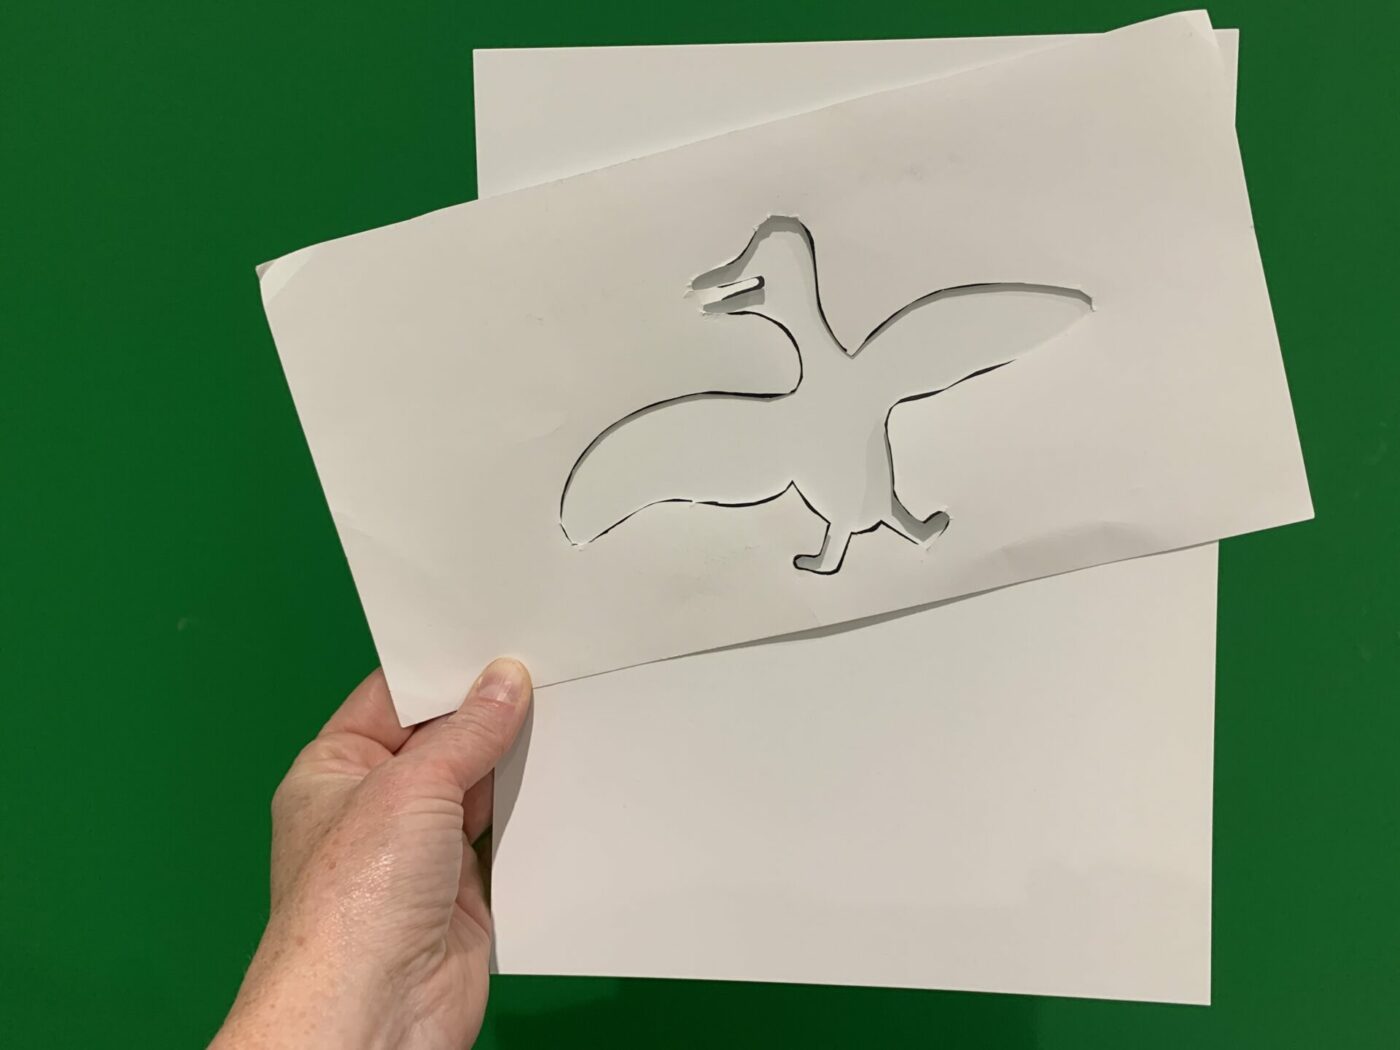
How to Create Your Stencil:
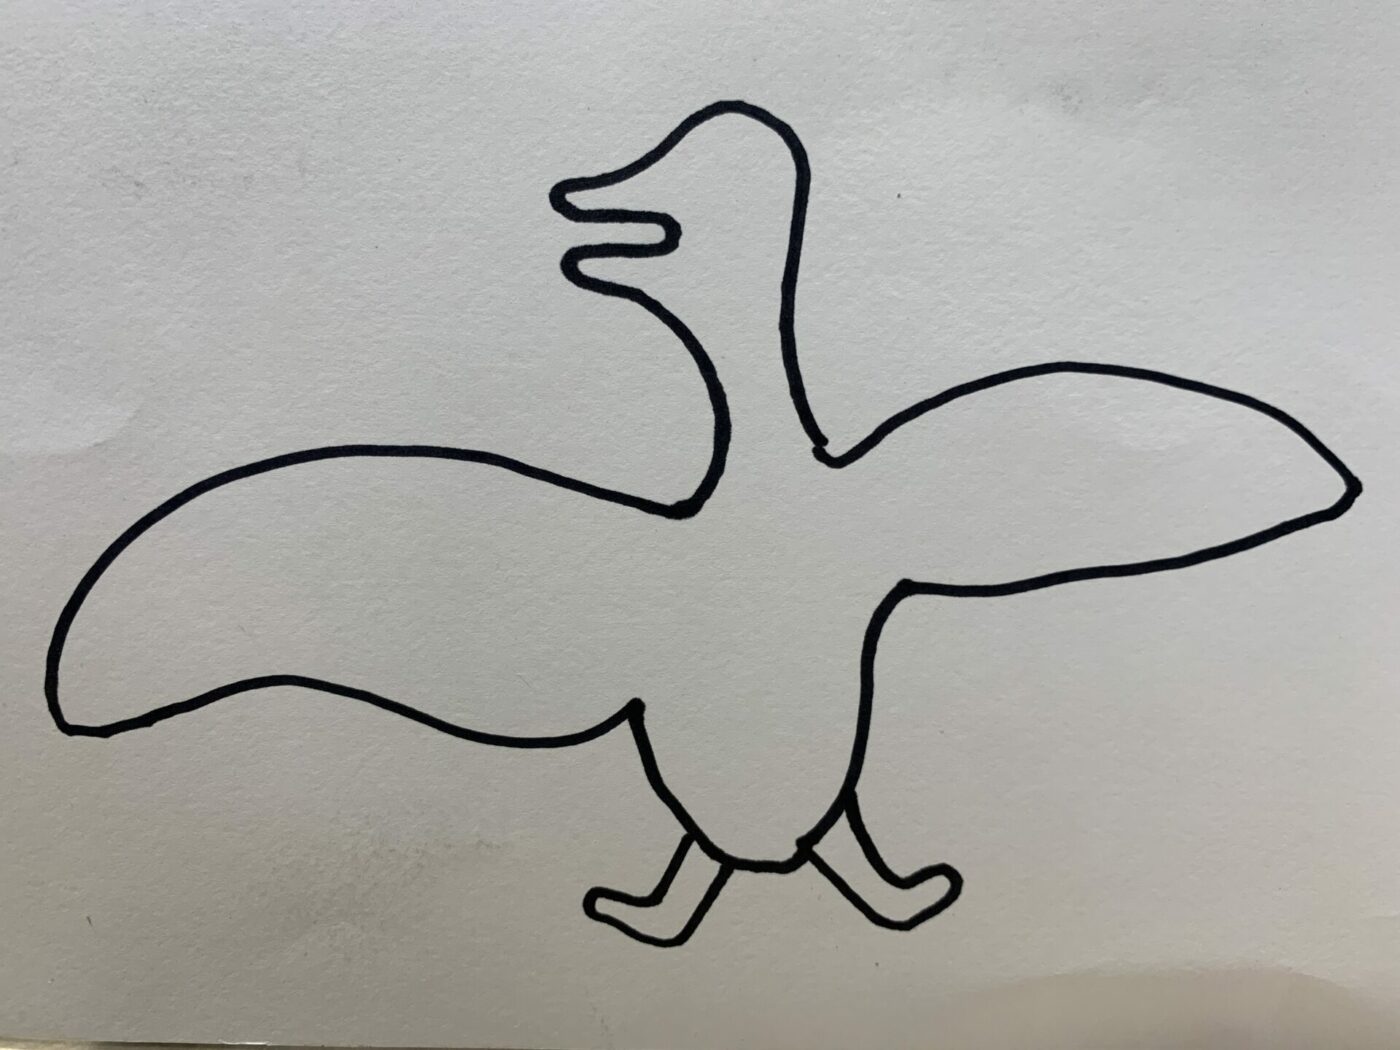
- In the centre of one of the pieces of paper, be inspired by Kellypalik Mangitak’s Blue Geese on Snow and draw a snow goose. You can choose to have the wings of the goose spread at the goose’s side or have the wings down.
- Draw an “X” in the middle of the goose.
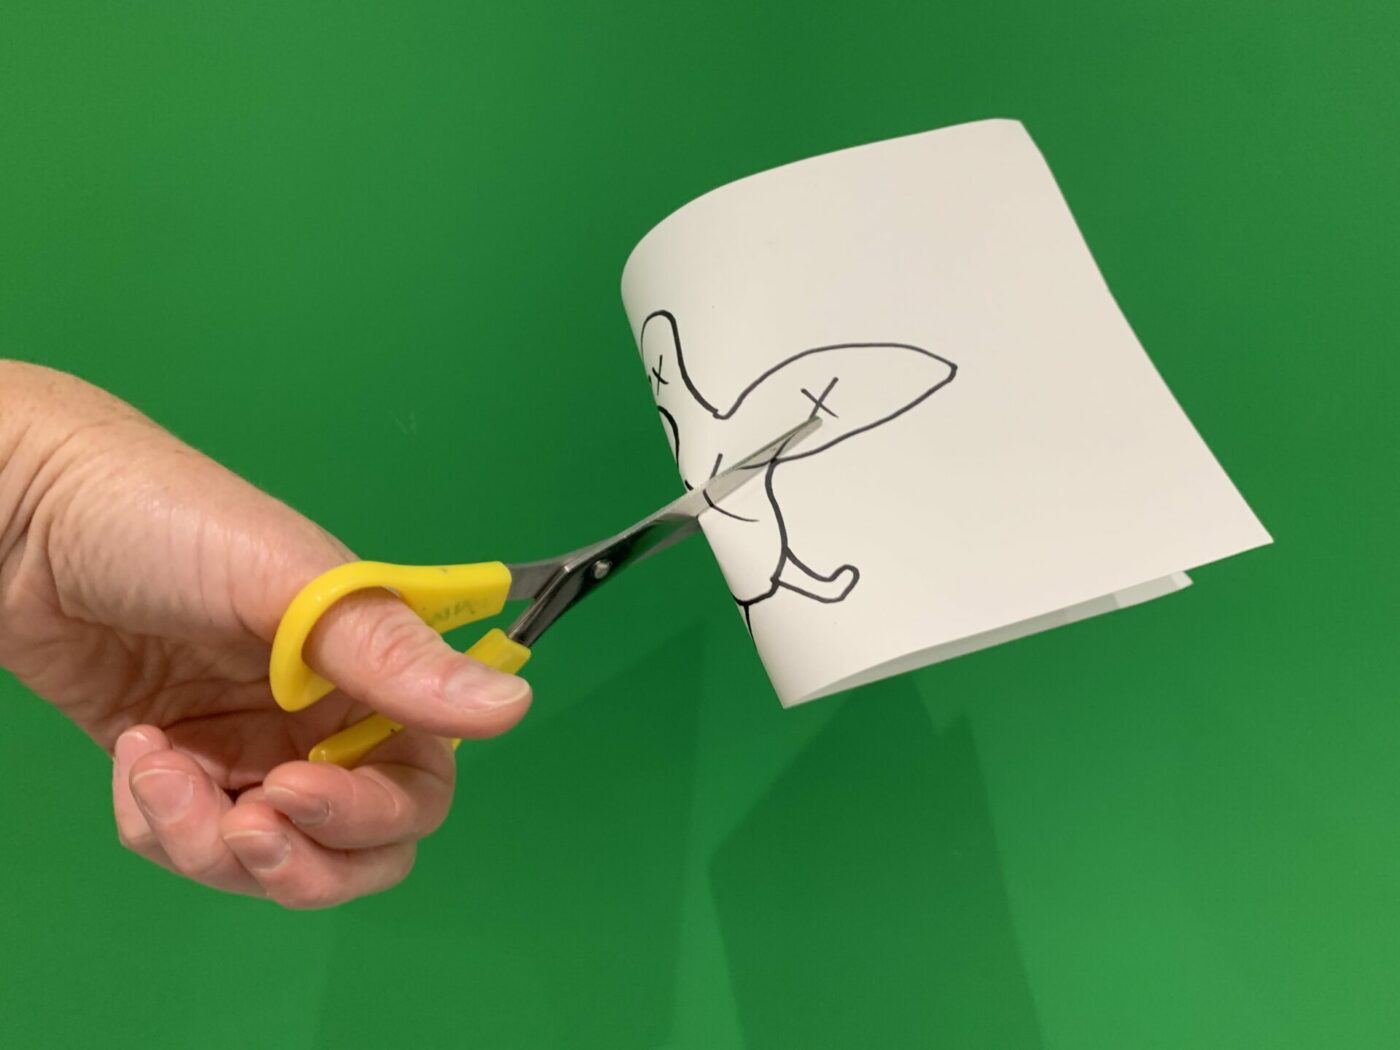
- Cut a hole in the paper where the “X” is. You can do this by either carefully poking the tip of your scissors into the paper where the X is and lifting the paper off the table a little bit, or you can gently fold the paper and cut where the X is using your scissors.
- Once you have created a hole in your paper, you can put the bottom blade of your scissors in the hole and begun to carefully cut along the line keeping in mind that it is not the inside part of the drawing that is the import part of the stencil, it is from the line to the outside part of the paper that is the important part. (note: if you accidentally rip or cut part of the stencil that you did not want cut, simply use a piece of tape to act as a band-aid and tape it together. Remember that the stencil is only the tool to help create your artwork, it is not your final artwork).
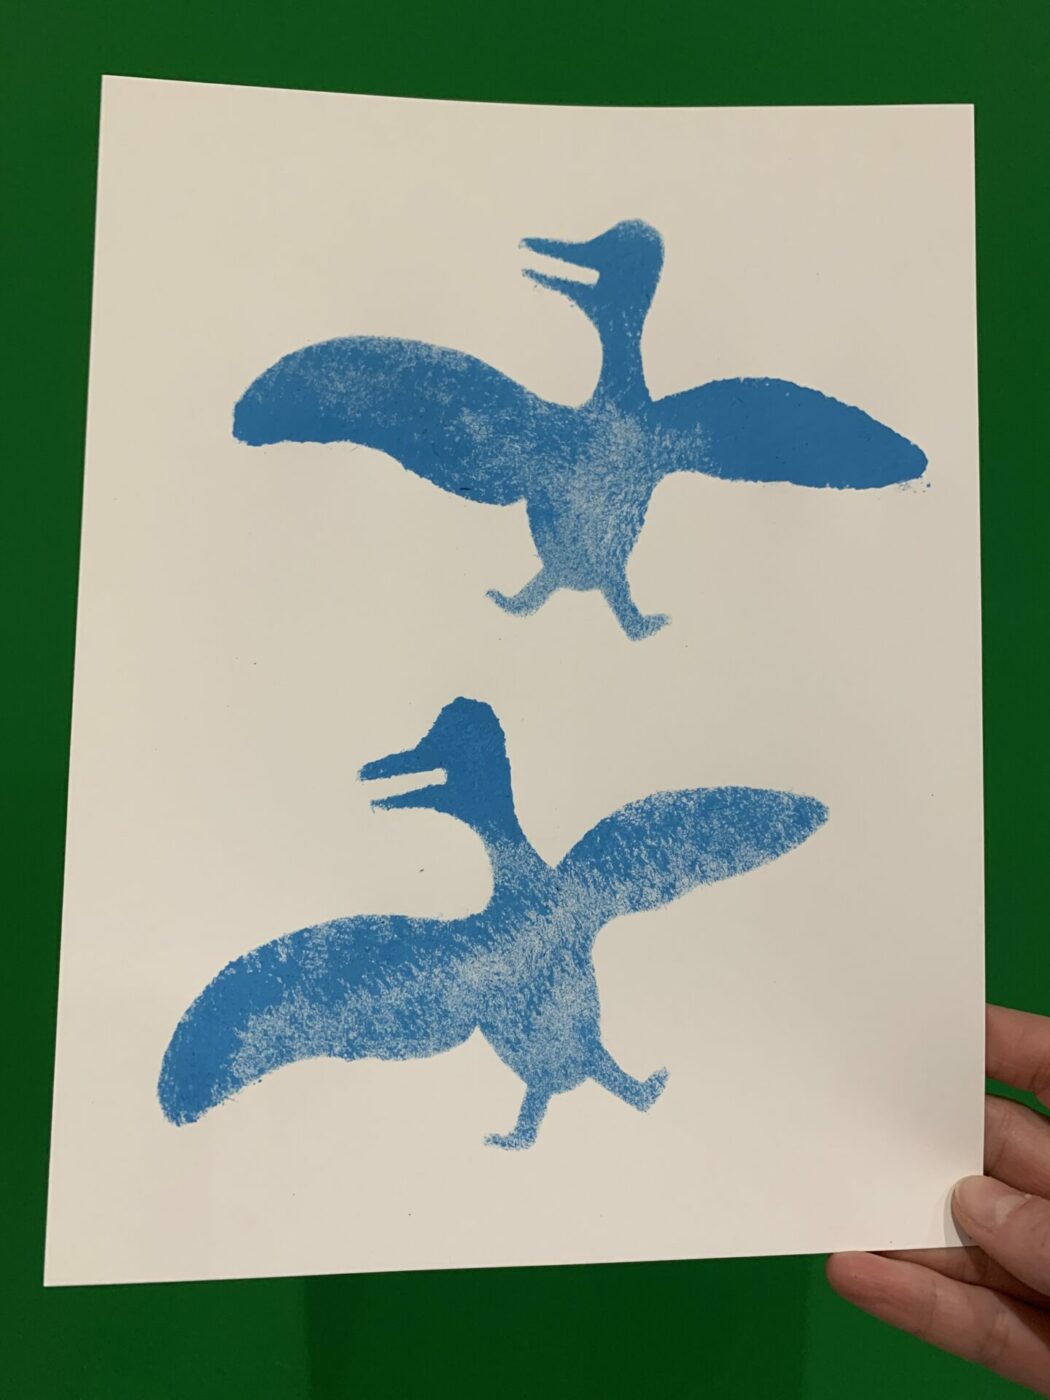
How to Create Your Stencil Print:
- Chose the paint colour that you are going to use, you can be as creative as you would like. You only need a very small amount of paint on a palette, and you do not need to add water to the paint so try to keep your paint brush dry and out of water.
- Put the second piece of cardstock paper in front of you and place the stencil that you just made on top of the piece of paper. You can choose to place it wherever you would like on the page.
- Put a very small amount of paint on your paintbrush. Using a part of your palette that does not have paint on it tap the brush on the palette to evenly spread the paint on your brush as remove any excess paint.
- With one hand, hold your stencil and paper in place, you do not want the stencil to move around. With the other hand, use your paint brush to dab paint into the space inside the stencil. You should try to get the paint on the line of the stencil as well as inside the empty space of the stencil. Try not to use your paintbrush in a back-and-forth stroking motion, but rather to have your paint brush gently jump up and down on the paper.
- When you have evenly filled the empty space inside the stencil you can carefully lift the stencil up to reveal the print that you have created!
- Put the stencil down in a different part of the paper. Repeat the printing process with the paintbrush to create another stencil-print of the goose. You can fill the page with as many geese as you like!
Congratulations, you have made a stencil-print artwork!


See this print and many more artworks in the travelling exhibition, Nakatamaakewin: Bringing art to you! Presented by Manitoba’s Credit Unions, in partnership with the Winnipeg Art Gallery and Manitoba 150.
2 thoughts on "Nakatamaakewin Stencil Lesson"
Leave a Reply
See this print and many more artworks in the travelling exhibition, Nakatamaakewin: Bringing art to you! Presented by Manitoba’s Credit Unions, in partnership with the Winnipeg Art Gallery and Manitoba 150.
Related Stories
Plan Your Visit
To plan your visit, check out wag.ca/visit.

Hello WAG, oh how I wish I could have attended the stencil workshop, even though I am an adult. I do painted floor cloths and I would like to be inspired to make my own stencils, especially ones created by children. I would like to make a cheque out to WAG but I want to make sure it goes to programming and materials for children to make beautiful art.
Hi Suzanne, that sounds so lovely! Thank you for sharing this with us, if you would like to make a donation to a specific program, please email gifts@wag.ca and they can help you out! Thanks so much!